I’ve recently decided it’s time to get my understanding of neural networks from theoretical to solid, and have decided the best way to do that is to write some neural stuff from first principles, starting with help from the digital book by Michael Neilson here http://neuralnetworksanddeeplearning.com/, and implementing things in a simple unity app. Plus, whilst I am a long way from an expert in AI, I am pretty good at translating math speak to programmer speak. So, with a little luck, I might be able to give a little clarity to some engineers wanting to take their first steps into AI along the way!
My goal here is to get a neural network running, and then eventually training, initially using the principles from the book (without pure copy-paste-porting), and then perhaps expanding them using some more advanced tools such as the modern ADAM optimizer. Alongside, I want to put a bit of game developer in and maybe make some cool visualisations or something.
The git hub repo for this series is here: https://github.com/chriscummings100/neuralfun
The git hub repo for the book by Michael Neilson is here: https://github.com/MichalDanielDobrzanski/DeepLearningPython
Dumping out the book data
Whilst I want to eventually move well past any need for the code from the book’s git hub, it’ll help to get started if we have a simple pretrained network and easy access to the MNIST database. As such, my first step is simply modifying the Python files from the repo above to dump the network and training data out to simple binary files that I can parse in C#.
Adding this to the network.py file lets me dump out the network layer sizes, biases and weights (more on this later).
        #write the num layers, sizes, biases and weights to a binary file
        with open('network.bin', 'wb') as f:
            f.write(self.num_layers.to_bytes(4, byteorder='little'))
            for x in self.sizes:
                f.write(x.to_bytes(4, byteorder='little'))
            for x in self.biases:
                f.write(x.tobytes())
            for x in self.weights:
                f.write(x.tobytes())
The MNIST database, which both the book and this blog will work with, contains a huge set of 28×28 pixel grayscale handwritten digits, each correctly labelled. I found it a little tricky to download in a form that wasn’t very python oriented, so I modified the mnist_loader.py to dump out things in binary:
    training_data, validation_data, test_data = load_data()
    with open('mnist.bin', 'wb') as f:

        datalen = len(training_data[0])
        f.write(datalen.to_bytes(4, byteorder='little'))
        for idx in range(0,datalen):
            f.write(training_data[0][idx].tobytes())
            f.write(training_data[1][idx].astype(np.uint8).tobytes())

        <same stuff for validation + test data here>
With that done, I zipped up each file so they can be checked into git hub without using a gazillion bytes, and am ready to start in C#!
Into C# and Unity!
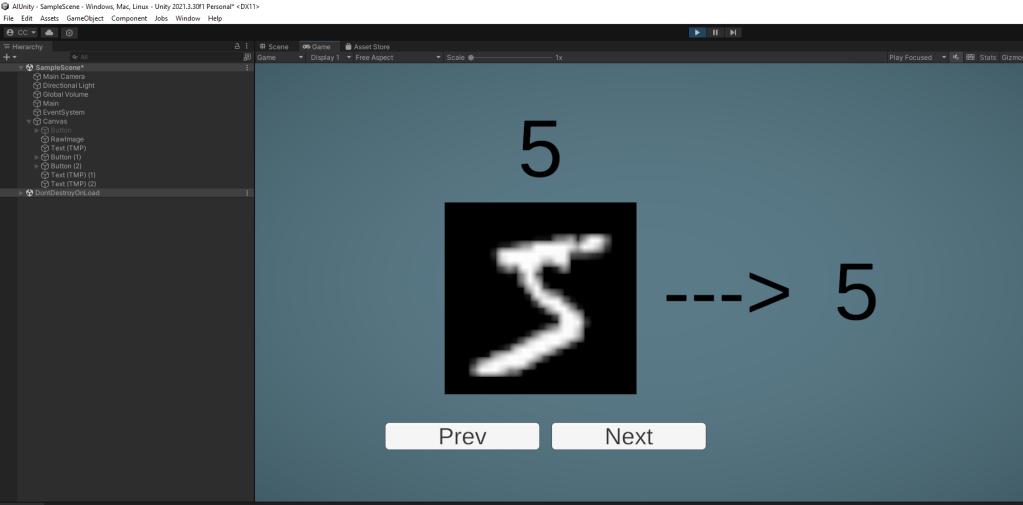
To get you super excited, this is target 1! A simple UI that lets me flick through the different images in the training set, see them along with their label, and also see what the trained neural network outputs.
So the meat of the work is going to be 1 component, with a few internal classes. The first key one, which will store (and eventually run/train) the neural network itself is this:
public class Network
{
    public int[] m_sizes;
    public double[][][] m_weights;
    public double[][] m_biases;
That is:
- The size of each layer
- The weights for each layer (not including a set for the first layer, as it’s the input)
- The biases for each layer (ditto)
More on these later!
Our Dataset is a little more complex. It consists of a core ‘Data’ structure which represents a single known input/output:
public class Data
{
    //data from MNIST dataset
    public double[] m_inputs;
    public byte m_output;

    //10-element vector with 1.0 in the position of the output label
    public double[] m_vectorized_output;
Each record in the MNIST database is an array of doubles (a value for each pixel in the 28×28 grid), and a single byte to indicate which digit it should be (0-9). However we want to setup a network that has 10 outputs, where each represents the probability of a given digit. i.e. if output 3 is the highest, we assume it’s a 3. So if we know the expected character is 3, the vectorized output would be [0,0,0,1,0,0,0,0,0,0].
public class Dataset
{
    public Data[] m_training_data;
    public Data[] m_validation_data;
    public Data[] m_test_data;
I won’t post the code to actually load the above arrays – it’s just some boring walking through a buffer, but you can read it in the git hub repo.
Drawing the data
I’m pretty happy with my maths, but nonetheless I like to visualize, plus pretty pictures are nice. So let’s write a simple function in the Data class to populate a gray scale texture so characters can be shown on screen:
public Texture2D CreateTexture()
{
    var tex = new Texture2D(28, 28, TextureFormat.RGB24, false);
    for (int y = 0; y < 28; y++)
    {
        for (int x = 0; x < 28; x++)
        {
            byte v = (byte)(m_inputs[y * 28 + x] * 255);
            tex.SetPixel(x, 27-y, new Color32(v, v, v, 255));
        }
    }
    tex.Apply();
    return tex;
}
Putting all the above together with a couple of buttons and a text box to show the label, we can now build ourselves a little Unity app to step through the different values in the database.
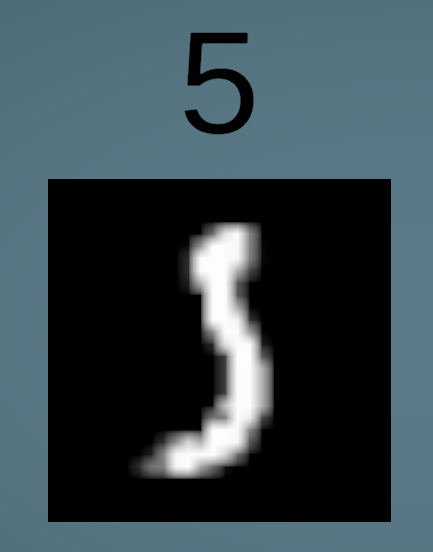
No actual neural network running yet, but we’ve got everything loaded and a simple UI that let’s us view and verify the data. As expected, when stepping through the database, the character and label match. That said, you’d be forgiven for thinking there was a bug given some people’s handwriting…
Running the network
Whilst I’m not an expert, I’ll try to give my programmers-eye-view of getting neural networks running (and eventually, training).
The idea is that for each layer we have a list of neurons that are linked to neurons in the previous layer. The structure of the network dumped out from the python file is as follows:

After the input layer, each neuron requires 2 pieces of information:
- A weight value per neuron from the previous layer
- A single bias value
So in the above diagram, neuron 3 in layer 1 (the hidden layer) will contain 784 weights, plus a single bias value.
A given neuron’s ‘activation’ (the value it outputs) is then calculated using the following psuedo-code:
//add up weight*activation from all links to
//neurons in previous layer
sum_of_inputs = 0
for(int i = 0; i < num_previous_layer_neurons; i++)
	sum_of_inputs += weight[i] * previous_layer_activation[i]

//neuron activation is the summed up inputs plus bias fed
//into activation function
activation = ActivationFunc(sum_of_inputs + bias)
This can be written much more simply however, if we think of the weights and activation arrays as really big vectors. If so, that first loop simply boils down to a dot product between 2 vectors, so we end up with:
activation = ActivationFunc(Dot(weights, prev_activations)
                            + bias)
The activations for the first layer are the inputs to the network (our 28×28 grid of gray-scale pixel values). We run this process for each neuron for each layer in sequence, and end up with activations for the final layer, which is it’s outputs.
The activation function is most commonly the ‘Sigmoid’ function, which when plotted on a graph looks like this:

Ultimately it’s a ‘soft’ version of outputting 1 when the input is positive, and 0 when the input is negative. In code, it’s pretty simple:
public static double Sigmoid(double z)
{
    return 1.0 / (1.0 + Math.Exp(-z));
}
We’re almost ready to start neural networking, but need one extra helper function first. Earlier I mentioned everything is simpler if we can think of the weight and activation arrays as vectors. To do so, we’ll write a dot product function (the sum of all the components multiplied together):
public static double Dot(double[] a, double[] b)
{
    double res = 0;
    for (int i = 0; i < a.Length; i++)
        res += a[i]*b[i];
    return res;
}
Ok! All the tools ready, let’s write the feed forward function that runs the network:
public double[] FeedForward(Dataset.Data data)
{
    //start with activations from the inputs
    double[] current_activations = data.m_inputs;

    //feed forward through the network
    for (int layer = 0; layer < m_sizes.Length - 1; layer++)
    {
        //get biases and weights for this layer
        double[] biases = m_biases[layer];
        double[][] weights = m_weights[layer];

        //calculate the new activations
        int layer_size = m_sizes[layer + 1];
        double[] new_activations = new double[layer_size];
        for (int neuron = 0; neuron < layer_size; neuron++)
        {
            new_activations[neuron] = Sigmoid(
               biases[neuron] +
               Dot(weights[neuron], current_activations)
            );
        }

        //store them
        current_activations = new_activations;
    }

    return current_activations;
}
This function is pretty simple, and is really just running the earlier per neuron pseudo code for every neuron in every layer sequentially. It starts by taking the inputs from the data as the activations for the first layer. These are fed into the 2nd, then the 3rd (and this could continue if we had lots more layers).
Note: point of confusion here is that m_weights[0] contains the weights for layer 1 and m_biases[0] contains the biases for layer 1. This is because the input layer has none.
That’s actually it for the neurons! The feed forward function takes the inputs, runs them through the network and generates the outputs. In the case of our network, it takes 784 inputs, runs them through the network, and generates 10 outputs – one for each possible digit.
Showing some results
The above is great, but not exactly readable. To get it on screen, we just need one final step – to convert those 10 outputs into a single digit, we need to find the biggest one. If output 3 is biggest, the digit is a 3. Simple!
    public static int MaxIndex(double[] a)
    {
        double max_val = -double.MaxValue;
        int max_idx = -1;
        for(int i = 0; i < a.Length; i++)
        {
            if (a[i] > max_val)
            {
                max_val = a[i];
                max_idx = i;
            }
        }
        return max_idx;
    }
Armed with that simple function we can now display which digit the neural network decided on. My full function that updates the image texture, label and result is called ‘SetData’ and looks like this:
    void SetData(Dataset.Data data)
    {
        if(m_current_texture)
            Destroy(m_current_texture);
        m_current_texture = data.CreateTexture();
        m_data_image.texture = m_current_texture;
        m_data_label.text = data.m_output.ToString();

        double[] results = m_network.FeedForward(data);
        m_result_label.text = MaxIndex(results).ToString();
    }
Job done!
Pretty impressive for the network generated in chapter 1!
All the code for this series can be found at https://github.com/chriscummings100/neuralfun, and the majority of the work for this post is in the Part1 folder.
Next time I’ll probably get training in so we’re no longer reliant on a network trained via the Python scripts provided by Michael’s book, though I may get side tracked by making pretty visualizations or something!
Proceed to my next: Neurons For Coders Part 2 – Back propagation for an introduction to the training process of neural networks.
